(Tutorial) “Cropping” – A Helpful Drawing/Painting Technique

A couple of weeks ago I mentioned that I was going to do a post on a helpful technique I frequently use when I am painting called “Cropping.”
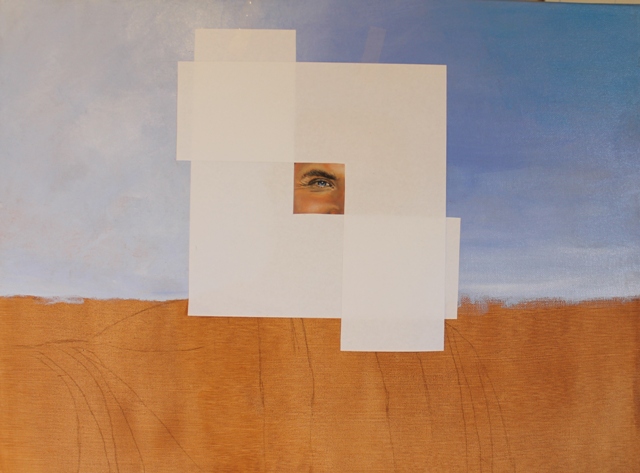
IMG_7661(r)

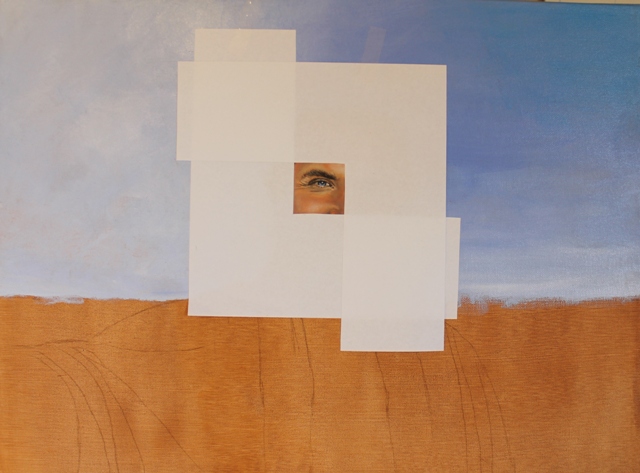
My latest canvas painting. I frequently use cropping to work on certain areas and make it less distracting for my eyes.

Now you may have heard the term “Cropping” before in terms of cropping a photo in a photo editing program on a computer or taking a physical photo and a pair of scissors and cropping the edges to size it down a bit. This technique is the same concept, meaning we are aiming to see only a certain portion of an image, but there will be no cutting involved (except to make our “cropping tool” – Full tutorial is below.).

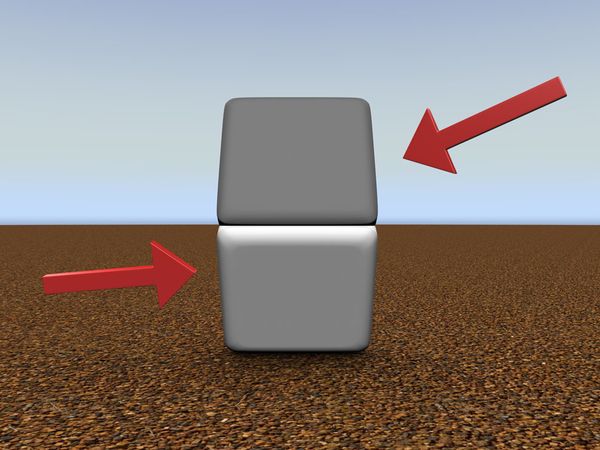
So why is this technique helpful? Well, have you ever had a reference photo for a painting and were just completely overwhelmed by all of the details, values, and colors involved? You may not think the whole image affects how your eyes perceive it, but the optical illusion below fully demonstrates how our eyes can fool us when overwhelmed by too much information.

(If you are having trouble figuring out how these two squares could possibly be the same color, put your finger over the middle of the two where they connect and see for yourself….)

Shadow-Optical-Illusion

Congratulations! You have just used the “cropping” technique! ๐Ÿ˜‰ย  You used your finger to block out part of an image so your eyes could better determine the true color value of the image.

Basically, cropping gets rid of “eye clutter” that is distracting you from true values, colors, and shapes.

So now I will show you how to easily make your own cropping tool:

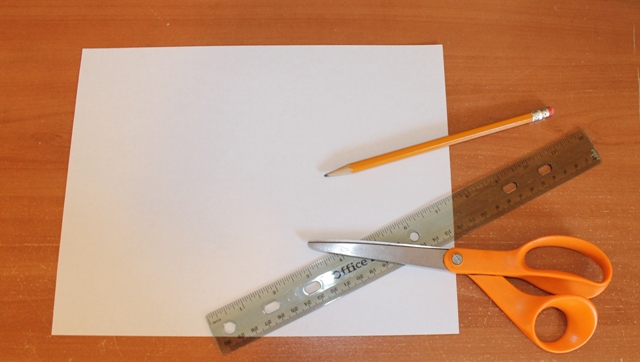
You will need a standard sheet of white paper (8 1/2″ x 11″), a pencil, a ruler, and a pair of scissors (Note: you can also use cardstock/poster board in place of the standard paper):

IMG_7636

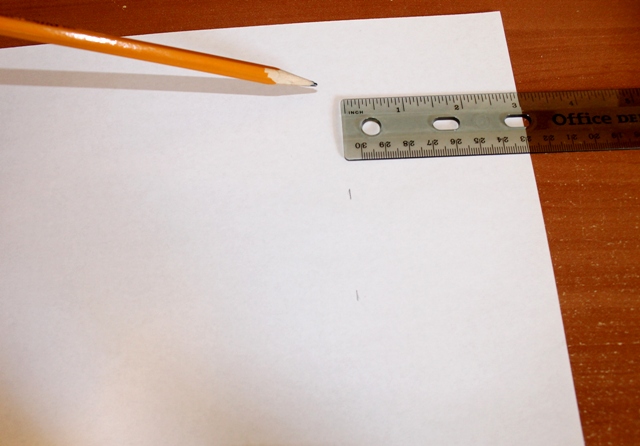
Now you will need to measure exactly 3 inches in from the border, all the way around the paper, and mark it accordingly. The picture below explains it better than I can:

IMG_7638

The lines are hard to see, but they are there….

Once you have marked all the way around your paper, it should look like this:
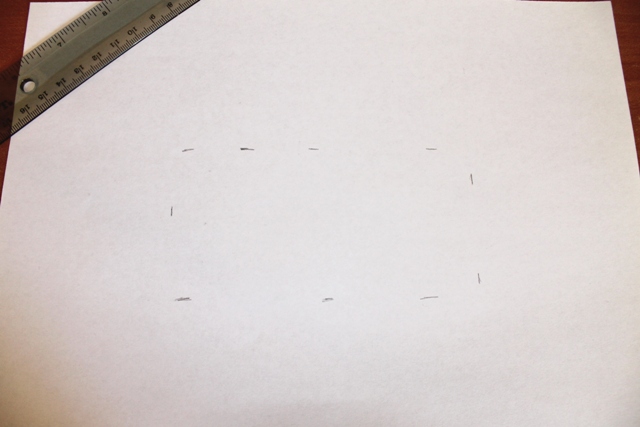
IMG_7642

You’ll have created a smaller rectangle in the middle, exactly 3 inches away from all sides of the paper.

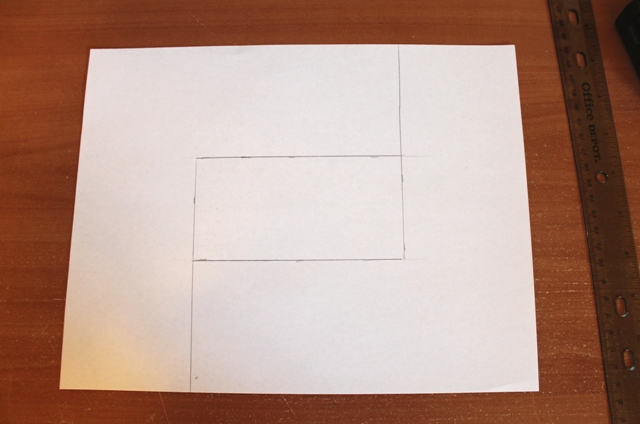
Then you will need to “connect the dots” to form an actual rectangle. Notice that I have extended the two lines from the shortest sides of the rectangle all the way to the edges of the paper – the left side extends down to the bottom, and the right side extends all the way up to the top:

IMG_7645

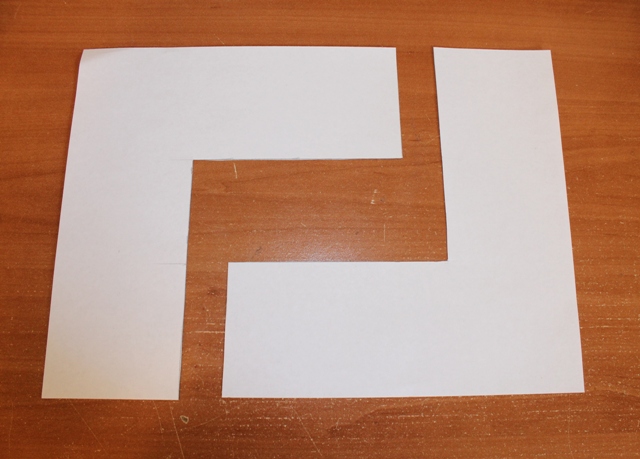
Now simply take a pair of scissors and cut on the lines. Discard the small rectangle in the middle. This should be your end result:

IMG_7647

You now have two separate pieces you can use to “crop” your painting/drawing.

You have basically created two right angles that you can use as tools to block out certain portions of your painting/drawing that you do not wish to see while you are working on it.

Now I will demonstrate how to use it:

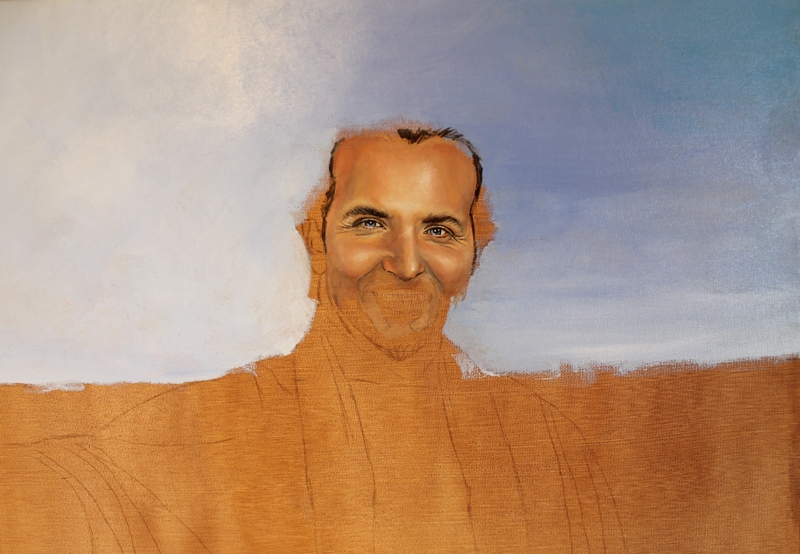
Here I have a rather large canvas painting I have been working on. As you can see, it is not done, but I have been using the cropping technique quite frequently on this piece. Here is what it looks like without “cropping”. I notice that when I work on it like this, my eyes frequently drift to the places that are not yet done, such as the mouth and chin area. It can be a bit discouraging seeing how much more work has to be done….and not to mention, it looks a little funny like this…:

IMG_7659(r)

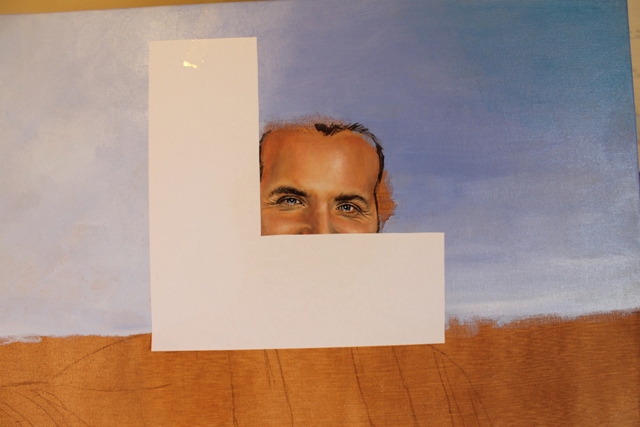
For this demonstration I will focus on one of his eyes. Below I have placed one of the right angles over the face and gently taped it onto the canvas. (Make sure your paint is COMPLETELY dry before you do this! I work with acrylic, so wet paint is little concern for me)

IMG_7660

Already it looks better – I could technically leave it like this, and it would still be fairly effective, but for the full effect I will add on the other right angle:

IMG_7661(r)

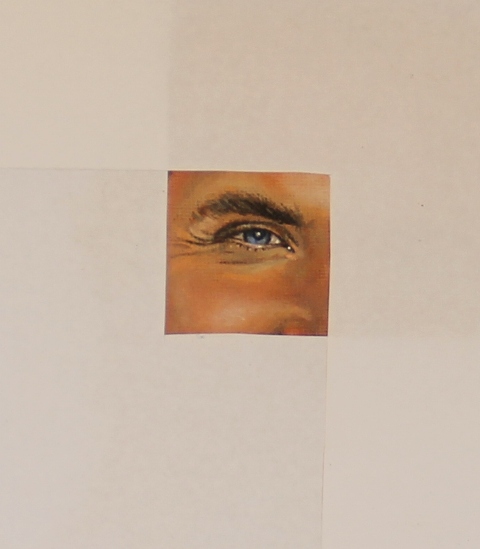
And here is a closeup of what I would be seeing as I am painting:

IMG_7661(c)

And even closer:

IMG_7661(c) close

As you can see, this technique creates a focus, and again, minimizes eye clutter. And the great thing about these tools is that you can make the area as small or as large as you wish (although making the area larger kind of defeats the purpose…)

You can also use the same technique on your reference photo. If it is a physical reference photo, then just use the exact same steps as demonstrated above. If your image is a digital image on your computer, then simply “zoom in” to the desired area.

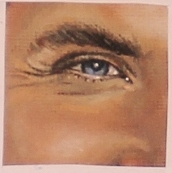
Here is my original image “zoomed in” to the same exact area I will be working on in my painting:

cropped eye

This technique is helpful to me because now I can clearly see what I need to work on in this area of the face.

Hopefully this technique will be helpful to you too – It can really make a world of difference. If you have been feeling overwhelmed/frustrated with your current drawing/painting, or if you just want to try out a new helpful painting technique, then give this method a try and let me know what you think! And as always, if you have any questions or concerns, feel free to leave them in the comment section below and I’ll answer to the best of my ability. ๐Ÿ™‚

Thanks for visiting TheFeatherArtist.com!

And Happy Painting! ๐Ÿ™‚

Posted in Painting Tips | Tagged , , , , , , , , , , , , , , | Leave a comment

Hobby Lobby: 25% Off Artist Paintbrushes and Art Storage

hobbylobby

Attention art supply shoppers! If you are looking for a great deal on paintbrushes or art storage be sure to check out Hobby Lobby stores or HobbyLobby.com! Currently they are offering 25% off all artist paintbrushes and art storage, including art portfolios! But hurry, this promotion only lasts until 4/13!

brushes

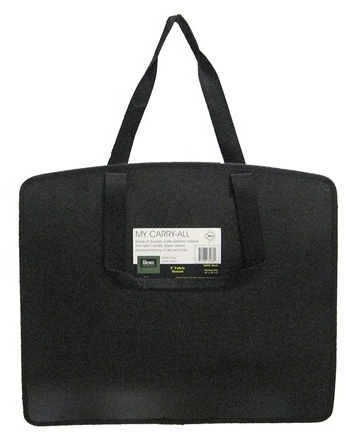
CARRY ALL

Also, if you have a Hobby Lobby store nearby, they are also offering 30% off Master’s Touch art canvas (Does not include promotional 2 packs) in store only.

art storage

And don’t forget they also offer a coupon (in store AND online) for 40% off any one regularly priced item (some exclusions apply)! Keep in mind that shipping is free for orders over $35.

So browse around and check out all of their great deals! If there is anything that is an especially awesome deal, be sure to come back and let us know what you find!


Happy shopping!

Posted in Uncategorized | Tagged , , , , , , , , , | Leave a comment

And The Giveaway Winner Is………

winner

I’d like to thank everyone who entered the giveaway for a chance to win a 36 Tube Set of Master’s Touch acrylic paint! And a big congratulations to the winner who has already been contacted via e-mail!ย  Please be sure to check your spam folder!!!! Thanks! ๐Ÿ™‚

ย And as a reminder, the winner has 3 days (72 hours) to respond to the winning e-mail notification or prize will be forfeited and another random winner will be chosen.

1 (One) 36 Tube Set of Master’s Touch acrylic paint (1 winner)
Required comment: “Tell me why you would like to win a set of Master’s Touch acrylic paint!”


Winner: Cherie M.“I would love to win this so I can give it to my boyfriend….”


Thanks to all for entering and please come back and check out more giveaways from TheFeatherArtist.com!


Posted in Giveaways | Leave a comment

 photo contestlogoresized_zpsc80279bc.jpgGiveaway! One Person Will WIN a 36-Tube Set of Master’s Touch Fine Art Studio Acrylic Paint!

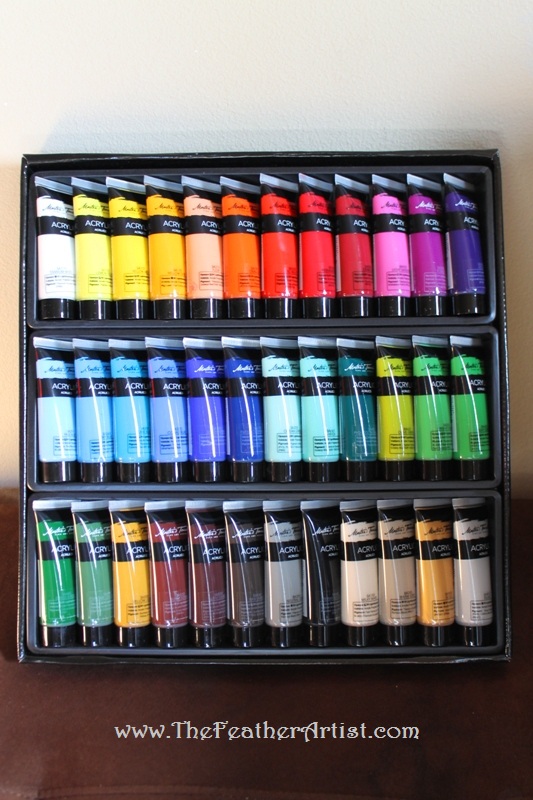
Set of 36 tubes of Master's Touch Acrylic paint

Set of 36 tubes of Master’s Touch Acrylic paint


Master's Touch Fine Art Studio acrylic paint

Master’s Touch Fine Art Studio acrylic paint

(THIS GIVEAWAY IS NOW CLOSED!)

As promised – the time has come for the giveaway! Read on for directions of how to enter!


Yesterday I just did a review of Master’s Touch acrylic paint. I really can’t say enough great things about this paint! – It is amazing!ย  I really is one of my absolute favorite brands. Master’s Touch acrylic paint is sold exclusively at Hobby Lobby stores. However, if you do not have a Hobby Lobby nearby, have no fear! – Master’s Touch acrylic paint is also sold on HobbyLobby.com! And don’t forget, Hobby Lobby offers a coupon for 40% Off Any One Regularly Priced Item! To use in store, just go to HobbyLobby.com and print out their coupon. Or to use online, simply add the coupon to your shopping cart before checkout (A banner will display the coupon above while shopping on their website); the coupon will then be applied to your highest regularly-priced item.

With the set above, there are 36 tubes of vibrant colors. Each tube is about 1oz. I personally have this set, and it is FANTASTIC! I absolutely love the wide range of colors offered, as well as the quality of paint. The colors are opaque and they are medium/heavy-bodied, but can easily be diluted to a thinner consistency by adding a bit of water.ย  If you want to see my review on Master’s Touch acrylic paint, click here, or scroll down to the previous post.


Now for the moment you have all been waiting for – One lucky person will win a 36-tube set of Master’s Touch acrylic paint! Valued at $27.99!!! (NOTE: Winner will NOT have to pay for shipping! I’ll take care of that! ๐Ÿ˜‰ ) And if you are not interested in winning the paint for yourself, then feel free to enter anyway for a chance to win the set for an artsy/crafty friend or loved one! (And just a note for the future – If you don’t want to miss a giveaway, subscribe to my blog so you can be among the first to know what is new at TheFeatherArtist.com!)

ย 

If you are interested in entering this giveaway, please click on the giveaway button below and fill out the entry form:

Giveaway Entry Button

Entries are limited to ONE per person (mustย  be 18 years or older to enter and a legal resident of the 50 U.S./D.C. Residents of P.R. are ineligible). Please do NOT email me to enter this giveaway; an email is not an acceptable entry. Also note that comments left on this post will NOT be counted as giveaway entries. However, please feel free to leave a comment! ๐Ÿ™‚

This giveaway will end on Wednesday, April 3rd, at 11:59PM MST, and the randomly selected winner will be announced later in the week.


Winner will also be notified via the email address he/she has provided. So please check that I have your correct email address before submitting via the entry form. TheFeatherArtist.com is not responsible for incorrect or misspelled email addresses. If the winner fails to respond within 3 days (72 hours) of notification, a new winner will be randomly chosen.


NO PURCHASE NECESSARY, A PURCHASE WILL NOT INCREASE YOUR CHANCES OF WINNING. The Giveaway starts on March 24th, 2013 and ends on April 3, 2013. Open only to legal residents of the 50 U.S./D.C. and 18 years or older as of time of entry. Residents of P.R. are ineligible. Void in P.R. and where prohibited.


Posted in Giveaways, News | Tagged , , , , , , , , , , , | Leave a comment

REVIEW: Master’s Touch Fine Art Studio Acrylic Paint

One of my absolute favorite brands of acrylic paint is Master’s Touch Fine Art Studio.

Master's Touch Fine Art Studio acrylic paint

Master’s Touch Fine Art Studio acrylic paint

I have been using this brand of paint for quite some time now for feather painting and canvas painting. Master’s Touch art supplies are sold exclusively at Hobby Lobby stores (and HobbyLobby.com) since Master’s Touch is actually Hobby Lobby’s brand. It is sold in single 4.1oz tubes for $3.99/tube, as well as 8.5 oz tubes for $6.99/tube and is available in 59 different pigments. It is also sold in various sets if you want to get the most bang for your buck.

Set of 36 tubes of Master's Touch Acrylic paint

Set of 36 tubes of Master’s Touch Acrylic paint

When you first lay eyes on a tube of Master’s Touch acrylic paint, you’ll notice it comes in a clear plastic tube with a black cap. At first glance the colors are extremely vibrant and eye catching – at this point you can only hope they will stay like that once you apply them to a canvas…and with a name like “Master’s Touch” it makes them sound all the more desirable…but will they really live up to their name and give you that Master’s Touch you’ve been looking for?….

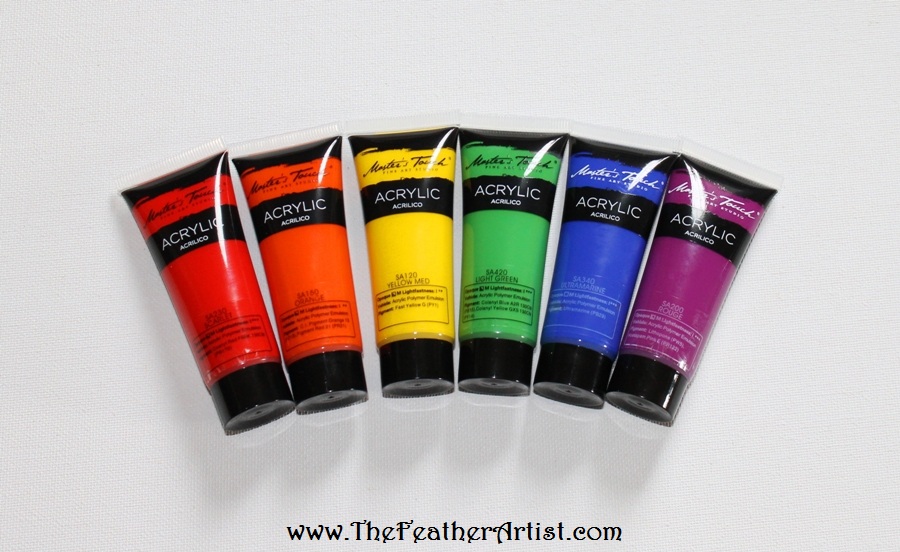
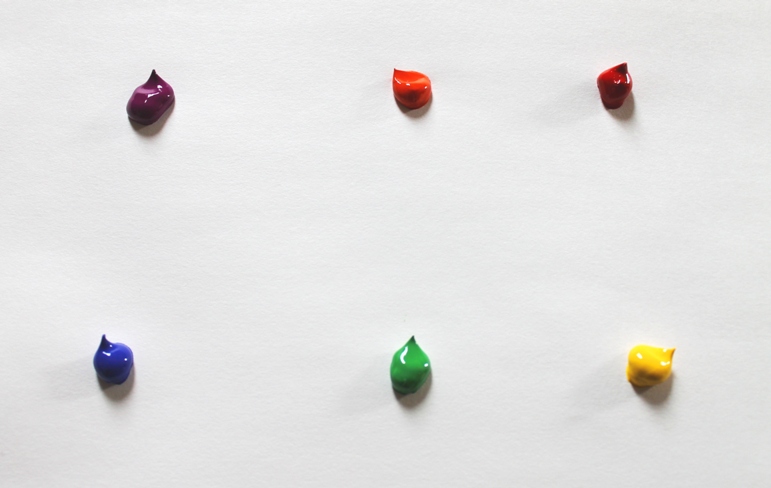
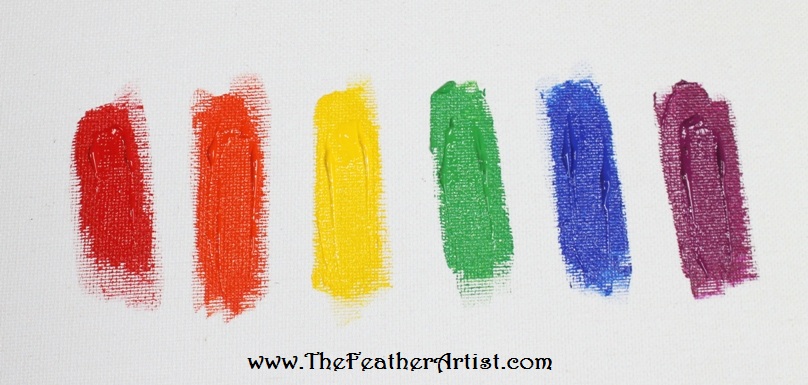
For purposes of this review, I will be using the following Master’s Touch colors: Scarlet, Orange, Yellow Med, Light Green, Ultramarine, and Rouge.

Master's Touch Fine Art Studio Acrylic Paint

Master’s Touch Fine Art Studio Acrylic Paint

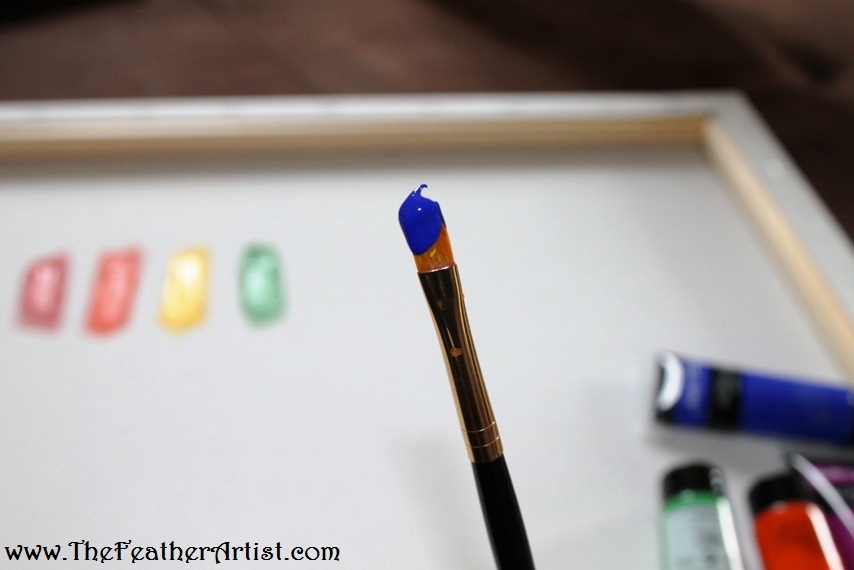
Upon laying them out onto a palette, you can see the viscosity (consistency) of these paints is nice and heavy-bodied. However, if you are not a fan of a heavier-bodied paint, these thin out very nicely with adding just a bit of water.

As you can see, the paint holds its shape quite well

As you can see, the paint holds its shape quite well. P.S. My camera really has trouble doing justice to the vibrancy of these paints.

A beautiful consistency

A beautiful consistency

Below I have painted swatches of color onto a canvas so you can see how opaque and vibrant they are. This is important to note since some paint brands look nice sitting in the tube, however once you apply them to a canvas they seem to be slightly transparent, requiring multiple coats to achieve an opaque result. But with Master’s Touch, what you see is what you get – beautiful, vibrant, and opaque color all around! Although you can thin out these paints quite a bit, I also demonstrated how easy it is to add texture if desired. Also it is important to note that the paints below are fully dry – which is saying a lot since it means they maintain their texture and vibrancy when dry. Some brands of paint are beautiful when applied, but once they are dry they tend to turn a darker shade – but I have found that does not happen with Master’s Touch.

IMG_7537(r)

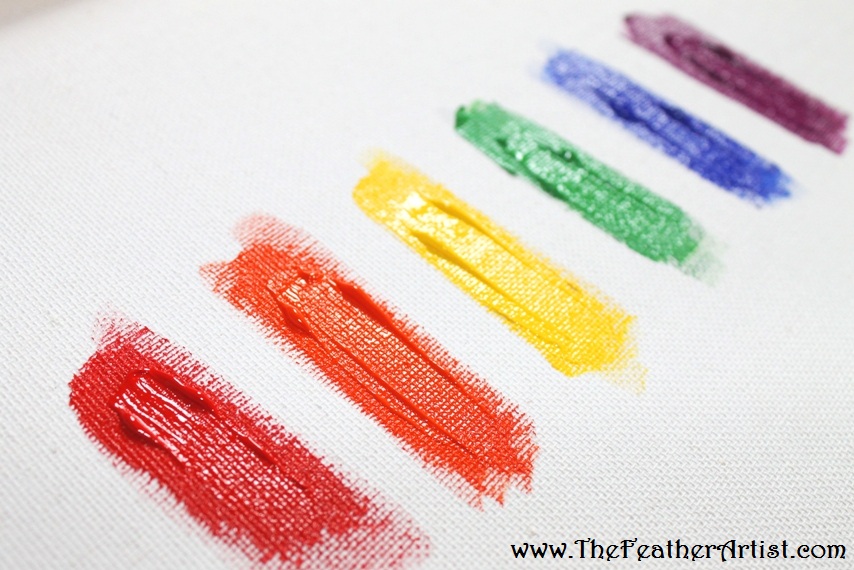
Now with the picture below, they were not fully dry, however this picture was just to again show the texture produced with a brushstroke.

Master's Touch acrylic can produce nice texture if you are looking to do heavy bodied work.

Master’s Touch acrylic can produce nice texture if you are looking to do heavy bodied work.

(Now personally, I do not do heavy-bodied work, but again, these paints are amazing even for thinner applications.)

And one small “plus” to note is the cap – (I have had trouble in the past with other brands and their containers. It is not uncommon for excess paint to ooze out of the container while you screw the cap back onto the tube…all the while the paint underneath the cap dries and becomes, for lack of a better word, a glue. Then a few days pass and you are left to come up with some creative ways to remove the stuck-on cap before your next painting session.) The Master’s Touch cap is made out of a special plastic that prevents this from happening. Even if there is paint overflow that dries underneath the cap, you’ll never have to deal with it being stuck.

And although I already mentioned the price above, I wanted to stress the fact that this is a GREAT price for this quality of paint. From my experience, paint of this quality should usually cost between $9-$18/4oz tube. Imagine my surprise when I first purchased a few 4oz tubes of Master’s Touch paint for $3.99 each, only to find that these paints were absolutely fantastic!ย  And to make the deal even sweeter, Hobby Lobby offers 40% off any one regularly priced item – in store and online! Just go to HobbyLobby.com to print the in-store coupon, or when shopping online, add the coupon to your cart and it will automatically take 40%off your highest priced eligible item.

In my humble opinion, these paints are totally worth way more than their price! After trying them for the first time I was hooked! So if you have been sitting on the fence about whether or not to try Master’s Touch acrylic paint, or if you have never heard about Master’s Touch and have been wanting to try a whole new brand, just remember you heard it here first on TheFeatherArtist.com – this paint is fantastic!


If you want to find out how you can have a chance to win your very own 36-piece set of Master’s Touch Acrylic paints, stay tuned for my next post on TheFeatherArtist.com!ย  I’ll be posting the giveaway directions later this evening!ย  (UPDATE: I’ll be posting the giveaway directions tomorrow! Check back soon!)ย  – I was originally going to include the giveaway on this post…but do you see how long this post is already?….. ๐Ÿ˜‰


If I did not answer your question about Master’s Touch acrylic paint, please feel free to write your question in the comment section below, and I’ll answer to the best of my knowledge. Or if you have been a fan of Master’s Touch acrylic paint and want to tell us your experience with it, feel free to write it in the comment section below! ๐Ÿ™‚

Happy Painting!

ย 

Posted in Giveaways, Supply Reviews | Tagged , , , , , , , , , , | 40 Comments

My Latest Feather Art Piece (A work in progress…)…PLUS Exciting News!…..

Although I absolutely love working on this blog, I also have an inherent need to paint quite often. ๐Ÿ˜‰

This is my latest feather painting, albeit a work in progress:

A feather painting work in progress by Brandy Davis

A feather painting work in progress by Brandy Davis

As you can see, I like to work on (and finish) the faces of my portraits before I start to work on the regalia and hair – Although I need a few more sessions before the face is complete on this painting. Then I’ll need an additional 6 hours or so to complete the clothing and regalia. I guess I enjoy seeing the painting come to life as I am working on the face -To me, the face is what truly captures the emotion in the piece, and the rest is just icing on the cake.

The turkey feather I am working on is about 11 inches tall, but the actual painted area is only 4 inches tall, which makes his face only 3/4″ tall – about the size of a nickel. So far I have mainly used a 20/0 spotter for most of his face, and occasionally a slightly larger brush for blending.

Anyhow, being that this is a work in progress, I’ll post some more pictures when it is complete.

If this is your first time visiting my blog, or if you haven’t seen it already, I have posted a video on YouTube which shows my entire process of painting a portrait on a feather from beginning to end. It is a time lapse video, so you wont have to sit through the actual 12+ hours it took. ๐Ÿ˜‰ย  Having said that, it is still 10 minutes long, so you wont hurt my feelings if you skip through a few parts here and there. ๐Ÿ˜‰ – Here it is below:


If you have any questions about feather painting or anything else art related, or heck if you just feel like leaving a comment, please feel free to leave one in the comment section below! Thanks for visiting! And stay tuned for the finished painting!


Now for the exciting news!ย  – In the coming days I will be hosting a giveaway for a whole set of Master’s Touch Acrylic Paints!!!! This is one of my absolute FAVORITE brands!ย  Stay tuned to TheFeatherArtist.com for your chance to win! Or, to make sure you don’t miss the giveaway, subscribe to my blog to receive updates when I have a new post! (There is a subscription form in the right column of my website)

Thanks!

And Happy Painting!


Posted in News, Uncategorized | Tagged , , , , , , , , , , , , | 2 Comments

It’s All in the Details…

"Richard" Acrylic on Turkey Feather by Brandy Davis

“Richard” Acrylic on Turkey feather by Brandy Davis

I can’t tell you how many times I have looked at a reference photo for a painting I am doing and felt completely overwhelmed by the amount of details contained within the photo, especially because the paintings I do are so small. Although adding details to a painting can be time-consuming, in my opinion it is well worth it in the end for the overall look of the finished piece.

I understand that some artists do not like adding details anywhere other than the face of the painting – I get it – it causes the face to become the focal point of the piece – and that can lead to a beautiful painting in its own right. I guess it really all boils down to an artist’s personal preference and style. My style, however, is adding lots and lots of details, no matter how small or where they are located.

No matter how small, every detail counts.

No matter how small, every detail counts.

Every time I sit down for a painting session, I take about 5-10 minutes to examine the details in my reference photo and determine how I am going to translate them onto a canvas via paint and a paintbrush.ย  And to create less “eye clutter,” or in other words, to make the photo a little less overwhelming, I employ a technique I call “cropping” wherein I cover up the surrounding area (or if using a photo on my computer, “Zoom in” to the desired area) so that way I can focus on a certain section of the photo. (I’ll discuss some easy ways to do that in my next post)

Spotters are ideal for adding details to a painting – they are a fine-tipped paintbrush with short bristles and short handles, giving you lots of control over your brush. And with adding details, a steady hand and controlled movement is a must. Take care to rest the edge of your “painting hand” or your elbow on a stable surface while you paint – it helps to maintain control of your hand and arm.

IMG_4472(resized)

The amount of space isn’t what determines how many details you include – it is determined by the amount of time you are willing to invest.

Remember to take your time and if needed, get a magnifying glass and paint everything you see. The details will add more visual appeal and give the viewer all the more reason to appreciate the time you put into your work.


Happy Painting!


Posted in Painting Tips | Tagged , , , | Leave a comment

Why Every Artist Needs Business Cards! PLUS: Vistaprint: 250 Personalized Business Cards FREE! (plus shipping)

free business card2

A common question for many artists and crafters is,ย  “How do I get my name out there?” There are many answers to this one question, as there are many ways to promote yourself. However, one of the most basic and effective ways is business cards!

cards2

If you haven’t had business cards made for yourself, I highly recommend you do – asap! As an artist, I carry around at least 10 business cards at all times – whether I going to the post office, or making a quick trip to the grocery store – You just never know who you will bump into and strike up a conversation with.ย  When I am at art/craft shows, I always make sure to take about 200+ with me.

If you have never had business cards made for yourself, then you probably A) think they will be too expensive, B) think they will be too complicated to make or C) are just procrastinating or D) all of the above.

Well, unfortunately I can’t cure “C)” for you, but I have great news about A) and B) – so now you have no excuse! In case you haven’t heard, Vistaprint.com is offering 250 FREE custom business cards! Keep in mind shipping starts at $5.99. And to make the deal even sweeter, the order will qualify you for $5 back on a future purchase!

cards2

To get this great deal on business cards from Vistaprint, click here, and then click on the pink “Choose from 45 Designs” button and customize away! Once you create your 250 customized cards, just head to checkout and your total cost will be $5.99, including shipping! ๐Ÿ™‚

P.S. After you place your order, you’ll be shown your order confirmation page, and you’ll also be offered the option to purchase 250 more business cards for $3.75 with no additional shipping cost! You definitely don’t have to opt in, but it is a great deal if you are looking for additional business cards!


Posted in Uncategorized | Tagged , , , , , , , , | Leave a comment

Ends Tomomorrow! 30% Off Paintbrushes and 25% Off Art Books at HobbyLobby.com!

hobbylobby

Just a heads up for any of you artists or crafters out there are needing new paintbrushes or art books – HobbyLobby.com is offering 30% off ALL paintbrushes (including sets) as well as 25% off ALL art books through 3/2/13, online only.

hobbylobbybrushes

I absolutely love shopping at Hobby Lobby for my art supplies. They sell some awesome quality paintbrushes from brands such as Master’s Touch and Golden Taklon (Loew-Cornell), plus many more. And if you need to brush up on your art skills (no pun intended), then browse their art books for some great resources!

hobbylobbybooks

Keep in mind that free shipping if offered on all purchases over $35, otherwise shipping starts at about $5.95. And remember, if you need to add more to your cart to reach the $35 for free shipping, you can use promo code: 2289ย for 40% off of your highest regularly priced item! (Some exclusions apply). Just add a regularly priced item to your cart and type in the promo code 2289 at checkout.

Remember, this sale ends tomorrow, so hurry and take advantage of this great sale!ย  I know I will – I am in dire need of new paintbrushes! ๐Ÿ˜‰

Happy art supply shopping!

Posted in Uncategorized | Tagged , , , , , , , , | Leave a comment

My Top 10 Tips on How to Have a Financially Successful Art Show

Art in the Bar. Photo Courtesy: IdahoStatesman.com

Art in the Bar Boise. Photo Courtesy: IdahoStatesman.com

If it is one thing I wish someone had told me when I started participating in art shows, it would be how to do it correctly. Being that I have participated in many art shows, I can wholeheartedly say that there is indeed a right way and a wrong way to maximize the success of the day.

Now I must clear the air and say that this post will be geared towards those who are wanting to make a profit at their show. I say this because there are some who participate in art shows simply for the fun of it, or for the camaraderie – which is totally fine. But for those of you who are relying on this art show to pay the bills, then this post is for you! ๐Ÿ™‚

For those of you who have never participated in an art show, but are considering it, or forย those of you who have done a few shows, but need some more ideas to boost sales,ย  I would highly advise a few things before you set out to conquer your big day (or two).

So without further ado, here are my top 10 tips to having a financially successful art show:

  • 1. Research the event you’ll be participating in – I cannot stress this enough! Now when I say research I mean: Make sure the venue is adequately advertising the event (there is no sense in participating in an art show/festival that no one knows about!), make sure it will be held in an area that will attract likely customers, and also make sure the individual(s) putting on the festival/show are reputable.ย  If the art show/festival has a nice history and is well known, then researching the venue is not necessary. Sometimes doing a quick Google search of the name of a show or individual can bring up some interesting reviews….


  • 2. Only show your best work –ย Now this does not apply if you have only made a few pieces so far. But as for the rest of you, don’t worry about crowding your booth with anything and everything you have ever made. As the saying goes – “Quality, not quantity!” Having too much going on in your booth can be visually overwhelming for your audience. Spotlighting your best work creates focal points, and showcases your strengths as an artist.


  • 3. Recruit friends or family for help – Now, before I go on, I want to note that it is entirely possible to do an whole show by yourself – setting up the display, loading/unloading artwork, setting up tables (if any), lighting, marketing/promoting, friendly chit chat with customers, writing up receipts, and then tearing it all down when you are done. But, having said that, please please please, for the love of art!! – Get someone to help you!ย  I have done many shows by myself (out of necessity), which include 13 hour days without a break. Luckily I have always had help with putting up and breaking down my booth, but let me be the first to say that doing a 13 hour day without help is HARD. Keep in mind that most festivals are held on multiple days, all of which that artists are expected to attend. Another solution, if your venue permits, share your booth with another artist and split the fees – having the help and companionship is well worth it.


  • 4. Do a demonstration – If your venue permits, do an art demonstration during your show. For one, most art show days are at least 6-10 hours long, so you’ll need to do something to pass the time. Why not impress your audience with a show of how you create your artwork? And two, people tend to appreciate your artwork more when they see it in progress. And three, you’ll be using your time wisely and making a whole new art piece! P.S. Remember to put the paintbrush down every once in a while – don’t neglect potential customers. ๐Ÿ™‚


  • 5. Network – Two words: Business Cards!!!ย  Don’t leave home without them! Even if you make the most basic business cards with just your name, e-mail, and website (or type of artwork) it will still be a great (and professional) alternative to hand-writing your name and e-mail on a napkin or a scrap of torn paper (Been there!-Done that! ;-)). Remember, ALL kinds of people attend art shows – including museum directors, gallery owners, and magazine editors. And on that note, be sure to snag as many business cards/names/e-mails from others who show interest in your work. A lot of my sales and bestย  opportunities to promote my work come after the show from people whom I’ve exchanged contact information with during the show.


  • 6. Cater – And no, I am not talking about food. ๐Ÿ˜‰ Actually, I am referring to catering to your potential buyers, or more-so, their budgets. Granted, there are some people that go to art shows with the intentions to spend a lot of money on an art piece or two. But I have found that most go to art shows simply for the enjoyment of seeing artwork, and with no intentions of spending over $10, if any money at all. So if you are looking to make up the $50 booth fee (or whatever your fee is), then remember to offer items within everyone’s price range. In my booth I usually have pieces ranging anywhere from a few dollars all the way up to hundreds of dollars. You can make smaller items ranging from promotional items such as custom key chains and custom postcards, all the way to smaller prints of your artwork. The possibilities are endless – feel free to get creative – you are an artist, after all! ๐Ÿ™‚


  • 7. Have prices established ahead of time – Whether you have the prices for each of your art pieces established in your head, or written down on price tags, make sure you know how much you will ask for each piece. In my beginning days of art shows/festivals, I made the mistake of going into them not really knowing how much to sell each piece for – mainly because I was scared of telling someone a price and them thinking it was too high for a small feather painting, even if that was what I thought it was worth. I guess you could call it fear of rejection on some level. However, it is a major turnoff to a potential buyer when you are asked, “How much?” for a certain piece of artwork, and all you can say is, “Well, uhhh…..hmmmm…..I wanna say, about….well….I’m not sure…I guess…$200?…” All that rambling makes you look unprofessional and gives off the vibe that you may be telling one customer one price, and telling another customer a different price for the same piece. Solution? – Just print all prices out ahead of time and clearly label each of your pieces at the show. (And remember to account for tax and if your venue requires – commission fees.)


  • 8. Buy a receipt book! – This is something I completely forgot when I started doing art shows. To be perfectly honest, I looked pretty unprofessional hand-writing receipts on scrap pieces of paper. So yeah, save yourself the mild embarrassment now and buy a receipt book for later.


  • 9. Remember – It’s not a competition! –ย  I know we have all heard that the art world is competitive, but don’t think of that in a conventional sort of way. Bottom line, when it comes to art, artists are going to create what they want, and customers are going to buy what they like. And chances are, there wont be any two artists selling the same thing, so you’ll have very little to worry about in that respect.ย  Just remember that, as artists, you are all on the same journey – so be nice and respectful to your art show neighbors – feel free to chat it up with them and take a look at their artwork; Offer to help them once in a while, or even show some fellow support by making a small purchase from them. Even if you end the day without making a dime from your show, you always want to be confident that you at least walked away with new friends. I have found that fellow artists in these art shows are some of the coolest, and nicest, and not to mention TALENTED people that I have ever met.


  • 10. Lastly, Have some genuine FUN! – If you are sitting there looking bored or angry because no one is coming to your booth, then chances are that no one is going to feel comfortable approaching you or your booth.ย  If you look like you are having fun and enjoying yourself then you’ll attract more people to your booth. Now, I added “genuine” in because I would like to stress the fact that you shouldn’t just put on a fake smile to try and sell stuff. If you have to put on a fake smile to do anything, then you should probably consider doing something else that actually makes you happy. Being an artist should be truly inspiring and uplifting for everyone involved.

Ever since I have implemented these tips into my art shows, I have always walked away with a successful day. So if you have been struggling with art shows, or need some advice for your first one, hopefully these tips will be helpful to you as well. And remember if all else fails, refer to tips #9 and #10! ๐Ÿ˜‰

As always, if you have any questions or comments please feel free to leave them in the comment section below, or feel free to send me an e-mail anytime!


Here’s to your next successful art show!

Posted in Painting Tips | Tagged , , , , , , , , , , | 1 Comment