Step 1: Dab a dime-sized amount of paint onto your brush
Step 2: Lather some paint onto your canvas
Step 3: Rinse
Step 4: And Repeat…..
(Why does the painting process sound so much like shampooing your hair?…)
There are so many ways to rinse your brushes in between color changes. So many containers, colors, and textures to choose from….so which one works best? Well, the key is to experiment and find what works best for you and your painting mediums. Here I will show you how to make your own container to rinse your paintbrushes.
(Note: The following homemade container is meant to hold water, NOT turpentine. Turpentine may eat through this form of plastic.)
As for me, I have tried many things over the years to hold my muddy painting water, including (but not limited to): coffee mugs, red plastic party cups, Mason Jars, a tin can, paper cups (NOT a good idea), a drinking glass with a Garfield image on it, Styrofoam bowls and cups, a small white bucket that came in an art supply kit, and a few other random containers.
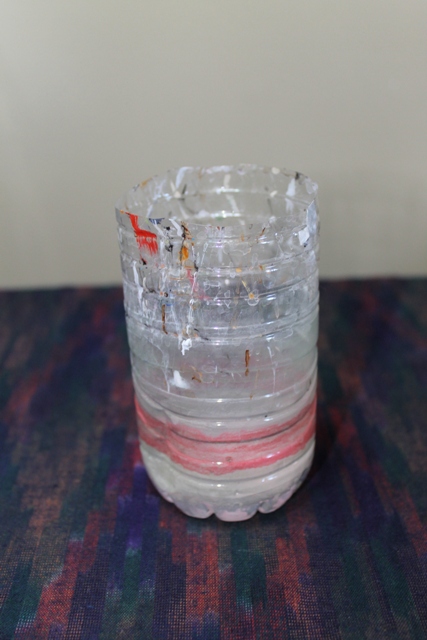
However, as my painting style evolved and improved, I felt that my rinsing container should follow the same trend – I needed something innovative….something “high tech”….something “top of the line”……so without further ado, here is my creation:
Ok, so maybe “high tech” is a bit of an overstatement….But even though it is just a modified water bottle, it really is a lot more sophisticated than it looks. (Again, there is always a method to the madness…) And as you can clearly see, I am due for a new one, so I figured I would use this opportunity to show you how I make mine – Even though I am sure you can figure it out just by looking at it. 🙂
Now I absolutely love this container! It’s cheap, durable, shatter resistant, and you can make it as short as you need if you are using small paintbrushes.
The top 2 reasons why this has been my go-to container for years:
1) It is clear. – Clear containers allow you to see how “muddy” your water has become during a painting session. So if you need to change water, you’ll know with one quick glance.
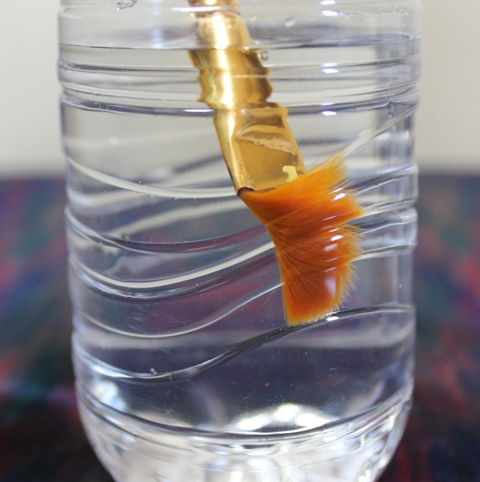
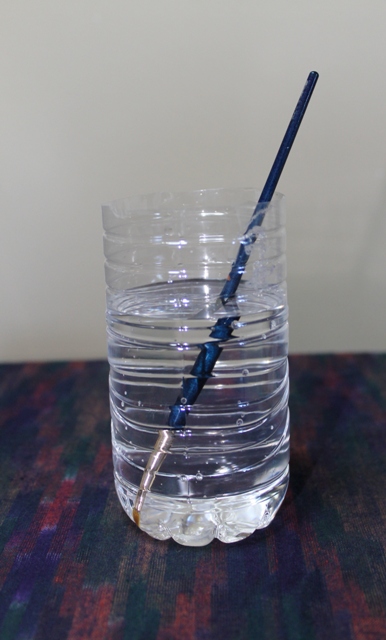
2) It has ridges! – (Keep in mind that not all 16oz water bottles have ridges, but I have found that a lot of generic brand water bottles do have them.) In my opinion, this is one thing that a lot of containers are lacking. (This is the reason why I don’t just use a Mason Jar or something similar.) Instead of dabbing my brush on the bottom of the container, I like to use the sides of the container. Ridges and creases give something for my brush to graze up against as I am rinsing. As the brush “grabs” onto these ridges, it allows the bristles to further separate and allow more paint to filter out into the water and down into the bottom of the container. This picture below demonstrates that point:
To make one of these containers is as simple as it gets:
Step 1: Acquire an empty water bottle with some kind of ridges on the sides, and remove the label if desired. (I’ll leave the size of the water bottle up to you. Personally I like to use the 16.9 oz bottles)
Step 2: Decide how tall/short you want your container to be. Although I didn’t measure mine before I cut it (I just eyeballed it to what I thought would be a good size for my small paintbrushes), it is about 4 ½ inches tall. If you desire, you could also take a sharpie and mark the container to your desired height.
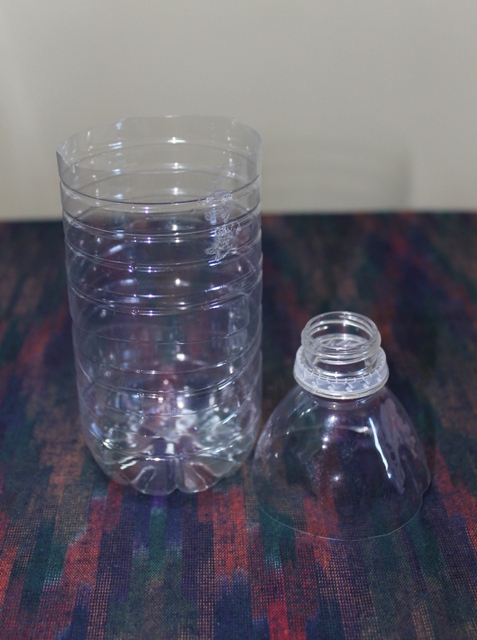
Step 3: Take a pair of sharp scissors (or a box cutter – but just be careful with that). Poke your scissors through the container a little above your desired height. Once you have a starting point established, start cutting the container carefully around the desired height until you have gone all the way around. And yes, you may have guessed by now, but basically all you are doing is cutting the top off. And don’t worry if it is a little uneven. The only thing you want to make sure of is that there are no sharp/pointy edges left.
Step 4: Fill it up 1/2 to 2/3 full with water, and VIOLA! A fully functional container to rinse your brushes! Now just be sure to rinse out your container after every painting session and you’re all set.
And as an added bonus, you can paint with the peace of mind that you just helped the environment…this is recycling at its best! 🙂
The key here is “resourcefulness”: Don’t look at something and see what it is – look at something and see what it can be!
Happy painting!
What kind of container(s) do you use to rinse your brushes? Feel free to post your answers in the comment section!



















3 Responses to Quick and Simple Homemade Paintbrush Rinser (How-to)