Do you ever see someone selling stuff online and their pictures look so professional that it makes you second guess your own photos? We assume they have some fancy-schmancy studio set up with professional lighting and a $1000 camera capturing these digital works of art….but maybe it is a lot more simple than we have all assumed…yes, that beautiful photo of the $200 pair of shoes you have been drooling over just might have been photographed in a cardboard box in someone’s living room… 😉 But the good news is that you can make your own! (not the shoes – the photograph!) 😉
For a while now I have wanted to buy a studio light box for an attempt at more professional looking pictures when I photograph my feather earrings, paintings, and other fun objects for my blog. However, being that many of us artists are on a budget I needed to come up with an idea that was easy on the wallet. Having said that, this baby cost me a grand total of $1.59. The only thing I had to purchase was the poster board for the inside backdrop. Everything else I had on hand. If you purchase everything needed to construct this light box, including the box, figure that you will be spending anywhere between $5-$10.
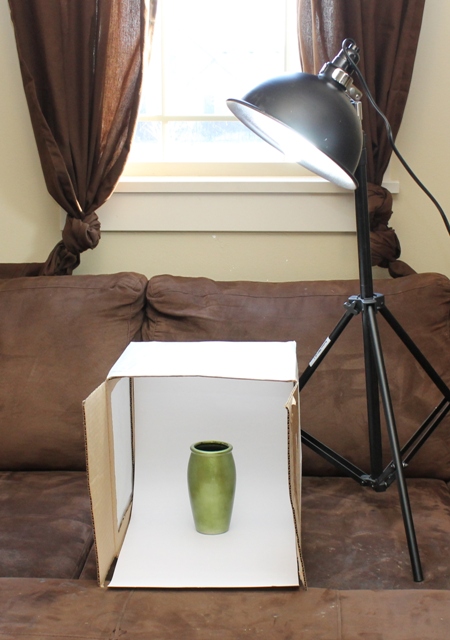
A studio light box creates soft, diffused, even light coming from either side or the top (or any combination of the three) when photographing your subject. It can be used with or without your camera’s flash, however the final product depends on your desired effect. The key is experimentation.
What you will need to make your own:
- 1 box (choose a size that accommodates your subject. I have chosen a 12″x12″x12″)
- Tape (masking works best, but whatever you have on hand should work fine)
- White tissue paper
- Poster board (This color will be your background. It doesn’t have to be white, but white helps to reflect the light better)
- X-Acto knife, razor, or box cutter (Be careful – no severed fingers please! 😉 )
Step 1 is fairly self explanatory. If your box was like mine, then you’ll just need to clean it up a bit – remove old tape and what-not. However, you’ll want to make sure the bottom of your box is taped securely before cutting.
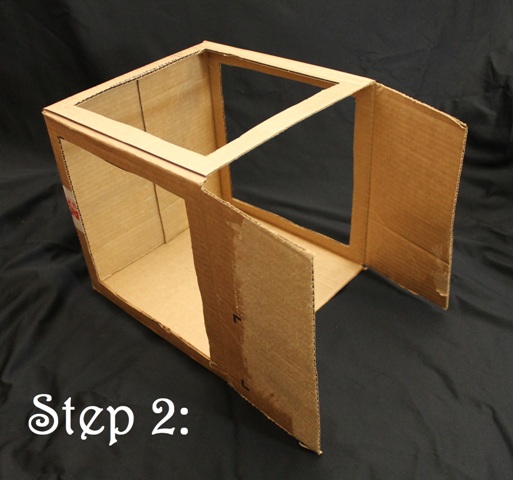
In Step 2 we are simply cutting out three “sides” of our box, about an inch from each corner, leaving the bottom of the box and one side intact. The side that is left becomes the “bottom” of our studio, and taped bottom of the box becomes the back. I also removed the top and bottom flaps of the opening, leaving two side flaps for controlling light. Anyhow, the picture explains step 2 better than I can (I’m glad they are worth 1000 words…).
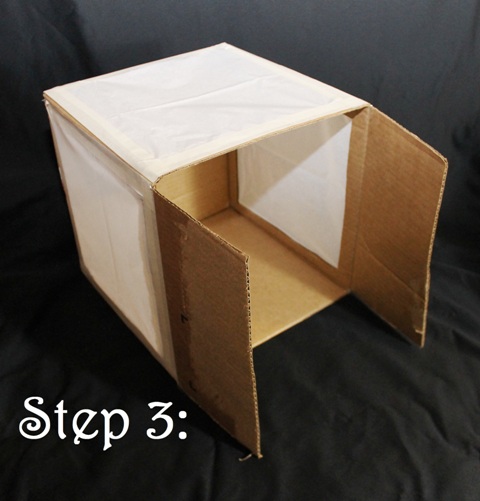
In step 3 we are taping the tissue paper over the windows. Nothing fancy. (And just a tip – I laid my tissue paper down on a flat surface, and laid my box on top of it and traced it. Then I cut about 1/4″ inside of my line and made 1 for each window.)
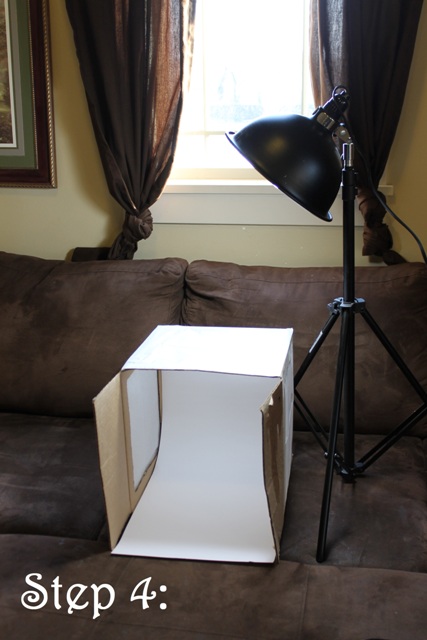
Lastly I added some poster board to the inside. Just cut to fit, and slide in. It extends past the bottom edge of the studio to allow for more depth when I am photographing. I didn’t tape it in, in case I wanted to swap it out later. As you’ll see below, it creates a nice, seamless background.
You can use a lamp as your light source, but it is not necessary to create a good picture. All you really need is some good ol’ sunshine. Generally I like to use both depending on the look I’m going for.
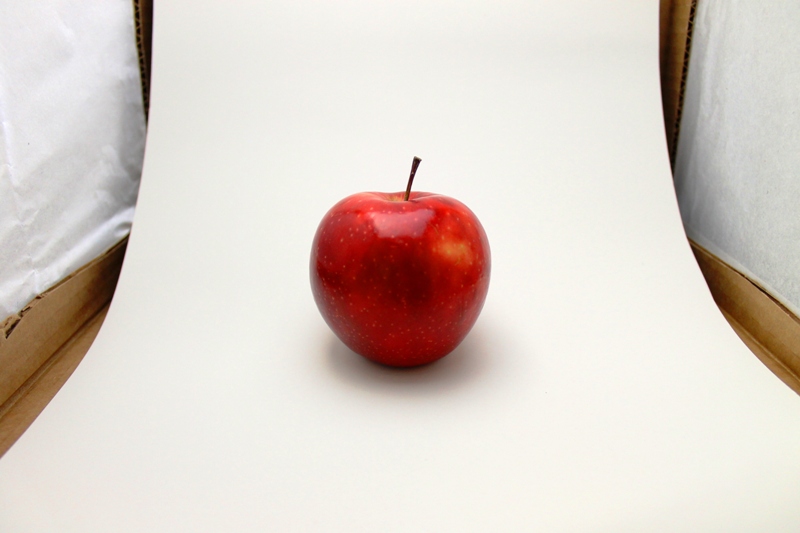
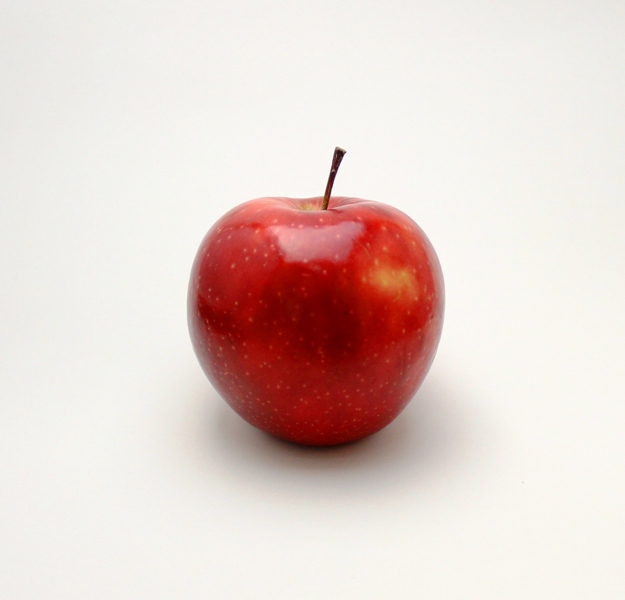
Below I have placed an apple inside of the box to show you the difference this box makes. It is lit from the side with sunlight, and from the top with a lamp. But because the box allows the light to bounce and soften, the apple is lit from everywhere. The shadow is even softened. You can use a flash when using this box, however it is not necessary. I did not use a flash for the photo below.
This is just one of the lighting effects this box can do, so just play around with it and see what lighting effects bring out the best in your subject. Either way, you can’t go wrong – You are bound to get some drastically improved photos with this.
Good luck with your new macro studio light box!!
Happy photographing!
(If you have any questions regarding this light box, please feel free to ask in the comment section below! Thanks!)





2 Responses to Do it Yourself: 4 Step Macro Studio Light Box