A moisture-retaining palette is a great addition to any acrylic artists inventory. I have owned one for many years (albeit, a homemade version) and I highly recommend it to any acrylic painter needing to keep a workable color palette for an extended period of time. It is also no secret to acrylic users that acrylic paint dries out quickly without using various mediums. So constantly wasting dried, unused paint can take a toll on the wallet. Having said that, a moisture-retaining palette can quickly pay for itself in just a few uses.
Simply put, a moisture-retaining palette is, you guessed it, a palette that retains moisture! 😉 So right about now you might be thinking, “Well, Duh!” But it really is quite simple. It is an air-tight container (to retain moisture), lined with some type of water absorbing material (to retain moisture). And once it is sealed up, it can stay quite moist inside the container for quite some time. And when you put your palette inside the container it keeps your paint nice and workable as if it were straight out of the tube! It can stay that way for weeks, but word of caution, I don’t recommend leaving anything moist sealed in an air-tight container, unrefrigerated, for over a week. Yeah, one time I finished a painting and sealed and forgot about my moist palette for over 2 weeks…I’ll be honest, I never even knew paint could smell like that…..needless to say, I NEVER did that again. “How can that happen with a non-perishable product?” you ask? I will reply with another question, “Have you ever washed laundry and totally forgot about it for a few days? Then when you finally remembered and opened up the washing machine, did it smell good?” Yeah, same thing… 😉 (Gross, but true, wherever there is water, there is life! And wherever there is warmth and water, then my friend, you have just created an incubator for who-knows-what. Fun fact. 😉 ) But really, just keep it clean and don’t forget about it and I promise that you’ll never have that problem.
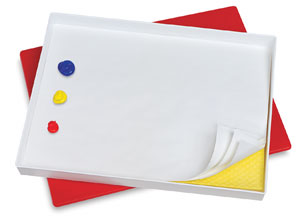
So back on topic, they make a few brands of this type of palette, a popular one being the Sta-Wet Palette. (Pronounced “STAY-wet. I used to own one of these bad-boys and to be perfectly honest, we moved a few times, and til’ this day I have no idea exactly what happened to it….) Anyway, it is an air-tight container lined with a yellow Shammy cloth (sponge) and layered above that is a disposable paper palette. It is simple to use – take the Shammy/sponge and run it under water and ring it out a little bit until it’s just a bit damp. Take your disposable palette and layer it over the top and then start putting down your acrylic paints. Once you are done with a painting session, you can simply cover with the airtight lid and store until the next day or longer.
However, being that these palettes can cost a pretty penny (although well worth it), I still have a less expensive, homemade version that works the same. I’ll confess that I originally made it out of necessity and because I didn’t want to fork out another $25 to buy a new Sta-Wet when I knew I could just make my own. Chances are that you already have the materials lying around your house to make yours too. I use mine quite often, especially when I am mixing a palette with custom colors and need them to last for a few days to a week. So I present to you my homemade moisture-retaining palette entitled, “Don’t get mad, get Glad!”
Materials you’ll need to make your own:
- One Glad Ovenware 9×12 pan and lid. (Or you can really use any airtight container that will fit the size of your palette. A non-porous plastic is strongly recommended. Food containers with tight-fitting lids are ideal for this.)
- Palette
- Paper Towels
- Water
It really doesn’t get any easier than this folks:
Step 1: Make sure your container is clean. In case anyone is wondering, I chose a glad ovenware container because it had the perfect dimensions to hold my 8″x10″ Peel-Off Palette (If you don’t know what a Peel-Off Palette is, you can read my post reviewing them here.)…and the ACTUAL reason I chose it because it happened to be sitting in my dad’s cabinet after a Christmas party. As it turns out someone brought some cookies in it and left it to be thrown out since it is disposable. Waste not, want not! 😉 Anyhow, I included a link above where you can order these pans, but I would recommend you pick them up in store for much cheaper. Although they are disposable, they are quite durable. I’ve had this one for about 3 years now.
Step 2: Lay in your palette. Please note that you can use a pad of disposable paper palettes here. The benefit to a disposable palette is that you can cut it to any size you need. But just about any palette you have will do. The only one I do not recommend is a wood palette because of the porous surface.
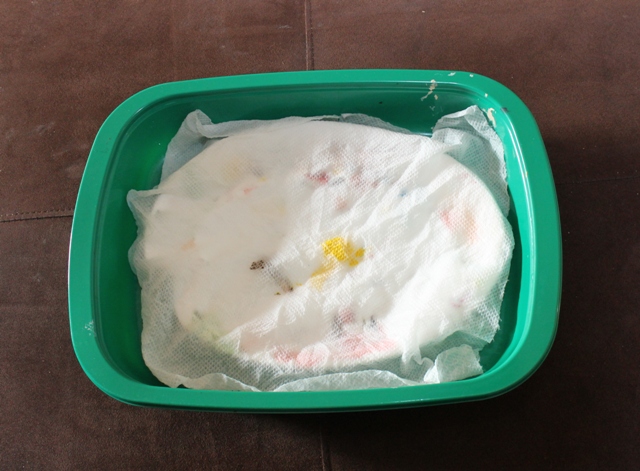
Step 3: Tear off a square of paper towel and wet it with cold water (Hot or warm water will only speed up the “incubation” process, which we definitely don’t want). Ring out the paper towel a bit so it is nice and damp, but not dripping wet. This is the part that is totally up to you, but after I lay my palette in, I gently lay my moist paper towel on top of my paints. You can choose to put the paper towel underneath your palette, but if you do then you may want to use about 3-4 paper towels instead of one.
Step 4: Take your lid and seal.
And that’s it! It will keep like this for quite a while. And just remember if you open it to re-moisten the paper towel after every painting session if it needs it. And to do this I just cover the paints with the same paper towel, and lightly spritz with a spray bottle filled with water.
I hope this DIY suggestion has been of some help to you. As always, if you have any questions or comments, please feel free to leave them in the comment section below, or just send me an e-mail and I’ll be happy to help as best I can! Thanks for reading!
Happy Painting!














2 Responses to DIY: Homemade Sta-Wet Palette (Moisture-Retaining Palette)