


As we have all heard before, “We must walk before we can run.” The same goes for drawing or painting. I have mentioned before that I have heard countless times, “I wish I could draw like that! All I can draw are stick figures!” And I have replied with, “Well, there was a time when a stick figure was all I could draw too!” My point is that we all have to start somewhere.
Consider this for a moment – even the greatest artists that ever lived in the history of the world – Michelangelo, Da Vinci, Rembrandt (and many more), didn’t start out with drawing masterpieces….They started out as young children drawing the exact same thing we did when we were handed our first Crayon when we were little: Simple lines, curves, and loops.
My very first art book I’ve ever had was called, The Basics of Artistic Drawing. It has been 10 years since I first laid eyes on its pages, and I still use it till this day. You may be asking, “Why have a drawing book when you are a painter?” Well, I will quote my high school art teacher Mr. Gravely for his insightful advice he gave me, “If you can master drawing in black and white, then you can paint anything.” And he was right – which is why it is very important to learn the basics of drawing if you really want to develop your talent….and chances are that you may have already started the basics and just not know it yet….
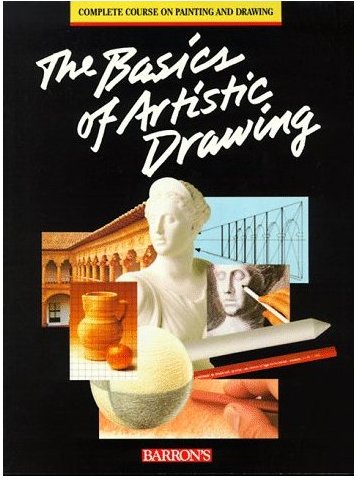
….An excerpt from the book, The Basics of Artistic Drawing –
“We would like to point out that every time you sign your name, you are drawing, in a way. The same training that in your childhood taught your hand to produce the wavy, straight, and broken lines that make up your name is now going to help you [develop your drawing skills]….Practice until you can produce a series of basic pencil strokes, straight lines, circles, parallel lines, cross-hatching, wavy lines, and spirals, as confidently as if you were writing letters of the alphabet.”
Now all of you experienced artists out there may be glazing over by now and wonder what any of this has to do with you. Well, for 1) it is always a great idea to go back for a refresher course. And 2) I am not saying this in attempt to challenge you (ok…yes I am… 😉 ), but although the exercise below looks easy, it is actually pretty darn tough.
So anyone can do this drawing exercise – both beginning and advanced artists, as well as people who think “all they can draw are stick figures.” 😉
The first image below shows the basic strokes we are attempting here:
- Parallel lines
-
Vertical and horizontal lines
- Curves and loops
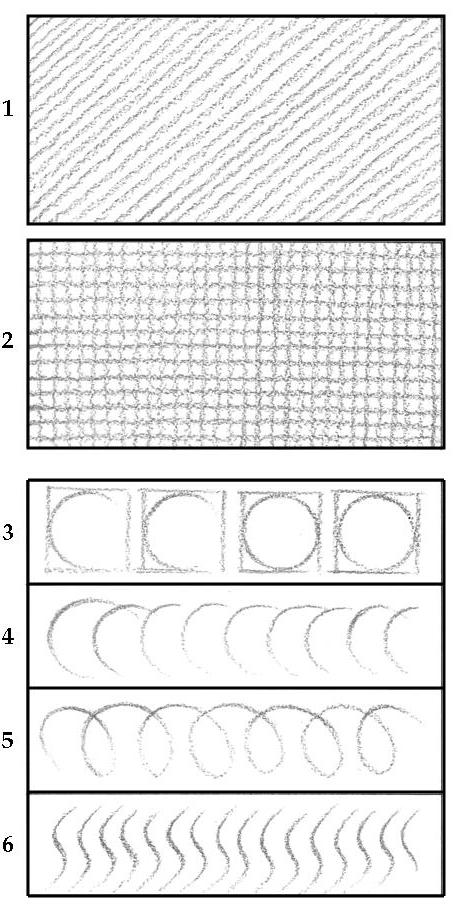
Figure 1
So you may have looked at that picture example and thought, “Well, I can do that!” (I love your optimism! ;-))……Now actually read the instructions and try it out – this is still a very difficult exercise for me! It is recommended you first try this out with a #2 pencil. It is also advised that you sit up straight, work in good lighting, and hold the pencil in a position that feels comfortable to you.
Below I have made a printable worksheet you can save to your computer and print out to practice the strokes above:
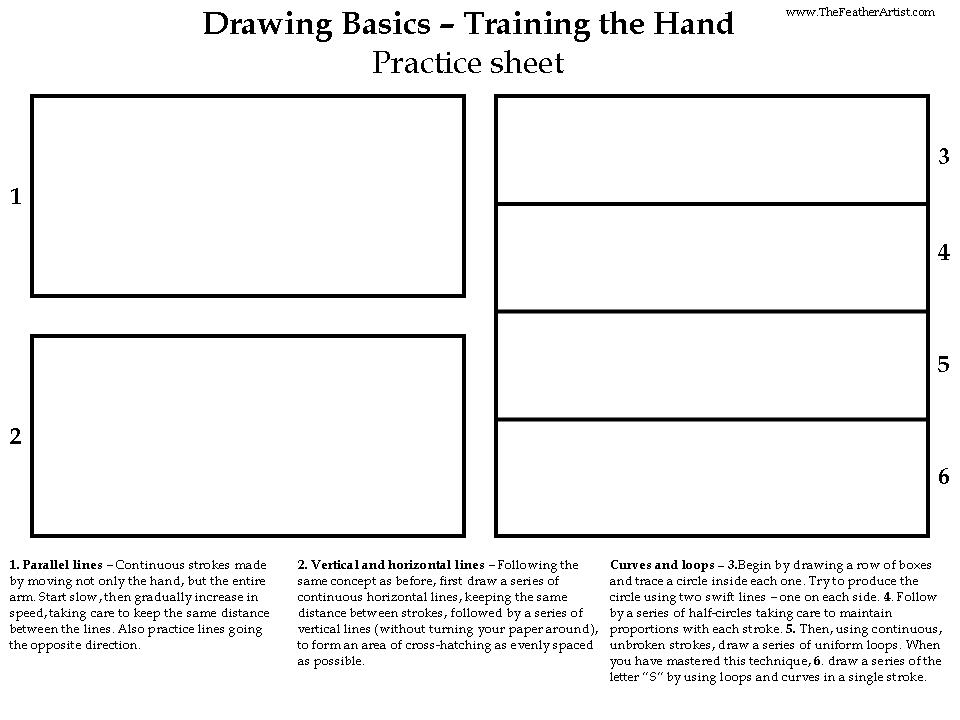
Just click on this image to enlarge, then right click it and select “Save As”. Then save it to wherever you like on your computer.
The hardest part with this exercise is to maintain consistency and proportion with each stroke. In other words, you really are aiming to make each stroke look as similar to the last one as possible.
By the way, here are the instructions in larger form if you have trouble reading them when printed:
-
1. Parallel lines – Continuous strokes made by moving not only the hand, but the entire arm. Start slow, then gradually increase in speed, taking care to keep the same distance between the lines. Also practice lines going the opposite direction.
-
2 – Vertical and horizontal lines – Following the same concept as before, first draw a series of continuous horizontal lines, keeping the same distance between strokes, followed by a series of vertical lines (without turning your paper around), to form an area of cross-hatching as evenly spaced as possible.
- 3, 4, 5, 6 – Curves and loops – 3.Begin by drawing a row of boxes and trace a circle inside each one. Try to produce the circle using two swift lines – one on each side. 4. Follow by a series of half-circles taking care to maintain proportions with each stroke. 5. Then, using continuous, unbroken strokes, draw a series of uniform loops. When you have mastered this technique, 6. draw a series of the letter “S” by using loops and curves in a single stroke.
Now what I have done below Is provided another printout – some may call it a cheat sheet, however, I call it a guide – And to put it quite simply, it’s not a cheat sheet since no one is grading your work 🙂 . In all seriousness, there are two reasons I provided the following accompaniment to the first worksheet: 1) So you can have a reference to look at and know what your end result should be (or you can reference the photo “Figure 1” above), and 2) So you can use it to place under the 1st worksheet and trace the lines to get a solid feel for how your hand and arm should move while making the correct lines (NOTE: After tracing each set a few times, you should work up to not having to trace at all.)
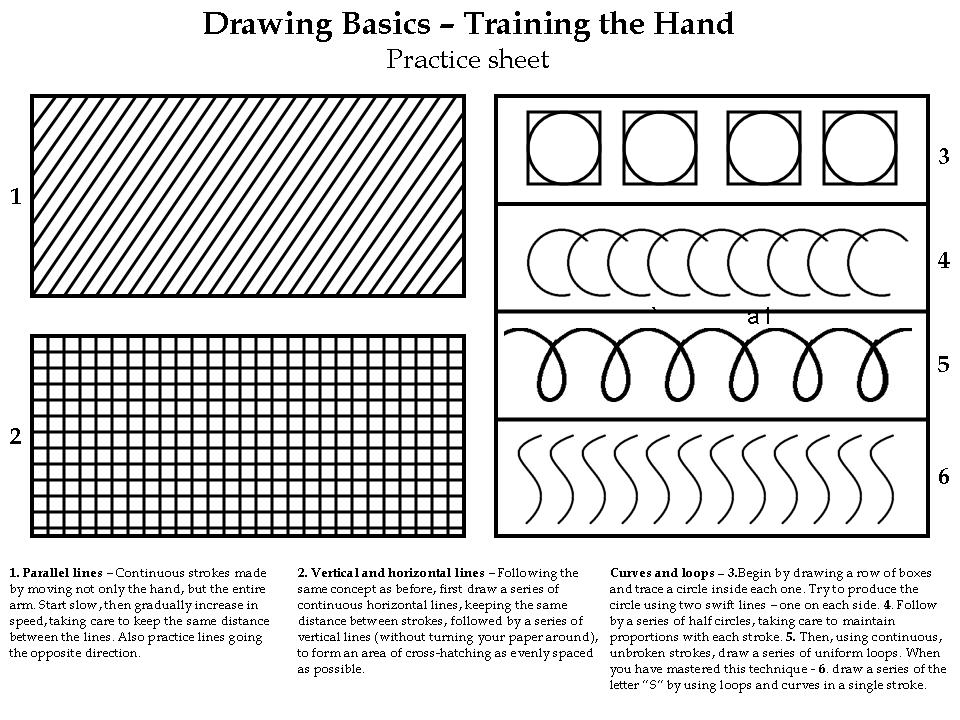
Click on this image to enlarge, then right click and select “Save As” to save to your computer.
The goal here is to eventually train your hand to to the point where you can confidently, effortlessly, and swiftly draw these consistent strokes. The length of time it takes to master these lines varies on the person. So even if you can’t make your lines as good as the first image (Figure 1) on the first try, or even the 9th or 10th try, don’t despair! If it is any reassurance, I have been drawing and painting for most of my life, and I still can’t make a swift straight line to save my life! But having said that, the key is to practice! – I know I can’t do it now, but I know one day I’ll be able to conquer that straight line! 🙂 So even if you have been struggling to draw stick figures, just remember to practice and always be optimistic.
I am going to end with a quote from everyone’s friend, Bob Ross – “This is the hardest part of this method. If you can do this, you can do anything.”
Happy Drawing!